Getting Started
Welcome to Elder Dialler.
This guide will help you get up and running quickly and show you how to make your first call with confidence.
What Elder Dialler Does
Elder Dialler is designed to make phone calls simpler, clearer, and safer.
It provides an easy-to-use speed dial pad, clear call confirmation, and helpful features that reduce accidental calls.
Install the App
- Open the Google Play Store on your Android device.
- Search for Elder Dialler.
- Tap Install.
- Once installed, tap the icon to Open.
First-Time Setup
Required permissions
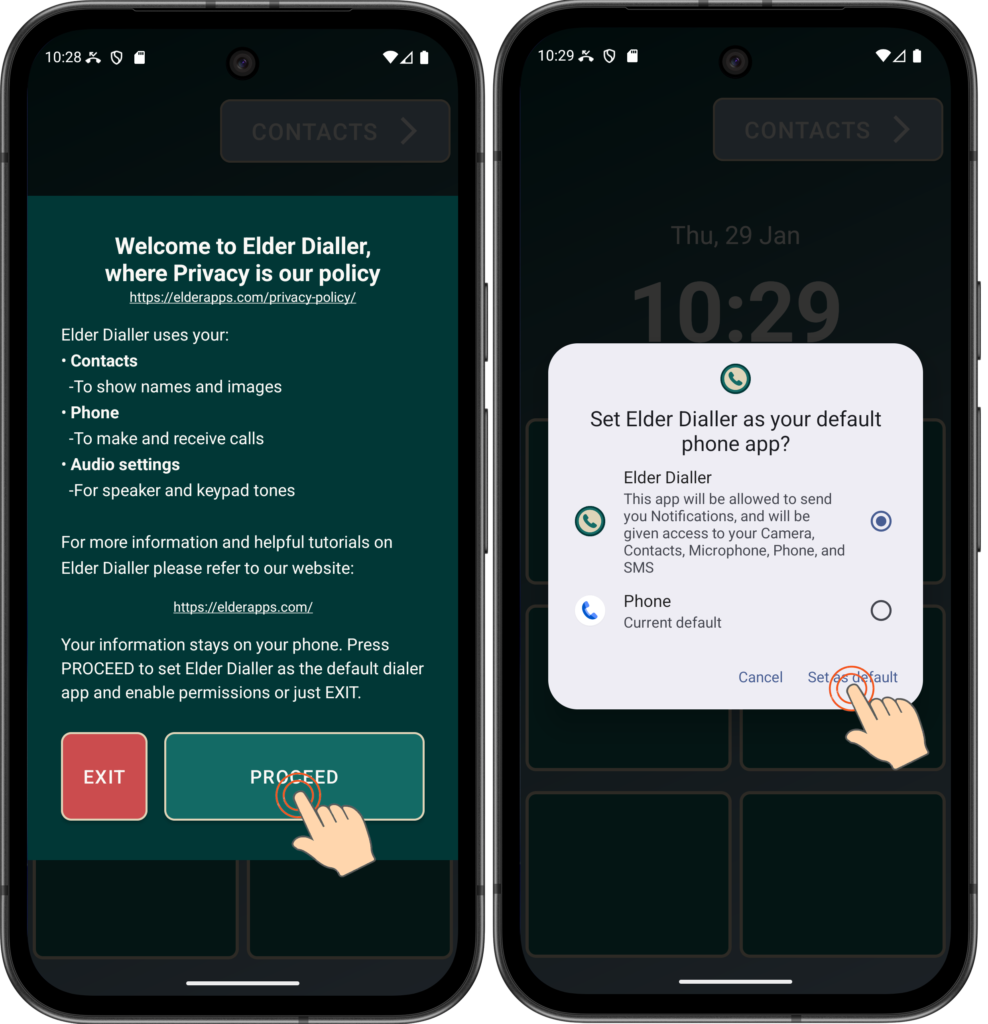
During first launch, Elder Dialler shows a startup screen asking for permissions. These are required for the app to work correctly.
Review the information and once you are happy for these permissions to be granted, then press PROCEED.
This will bring up the Default Dialler request. The application requires ‘default phone app’ permissions in order to be able to make and receive calls and access contacts.
You can select ‘Cancel’ if you like, and you will be able to review Elder Dialler look and feel, but any calling and contacts functionality will be disabled due to lack of permissions. All calls will continue to use the Basic default dialler and the Contacts app that comes bundled with the phone.
Please select the ‘Set as default’ text to enable Elder Dialler to work fully.
Note that you can also remove this permission at any time from the Settings menu (go to Settings -> Apps -> Default apps->Phone app), but this will negate all Elder Dialler benefits.
If you are concerned about your privacy, please refer to the Elder Apps Privacy Policy.
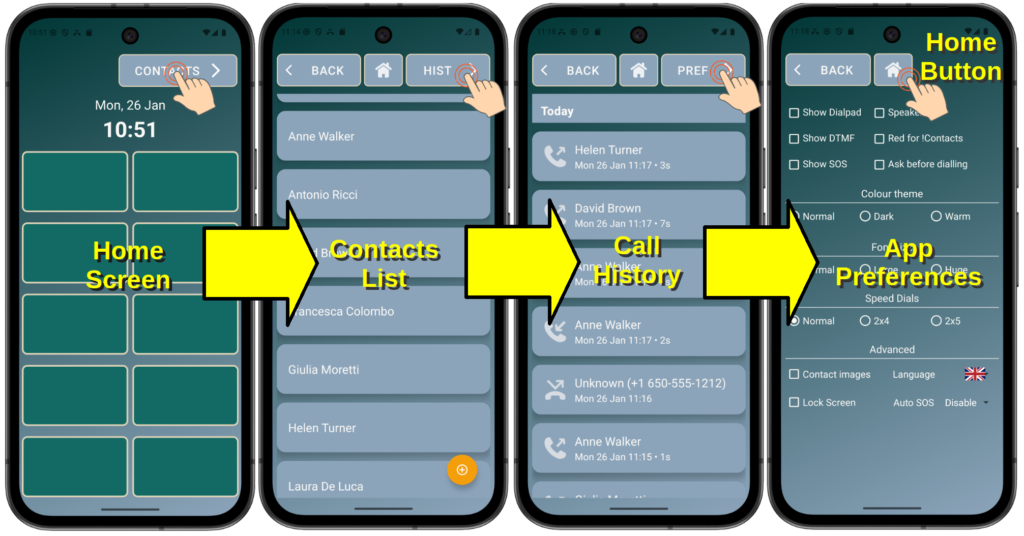
Menu Navigation
The Elder Dialler is designed with four main user screens which are selectable using the buttons at the top of the screen.

Your First Call
- The sequence of steps is shown in the pictures below
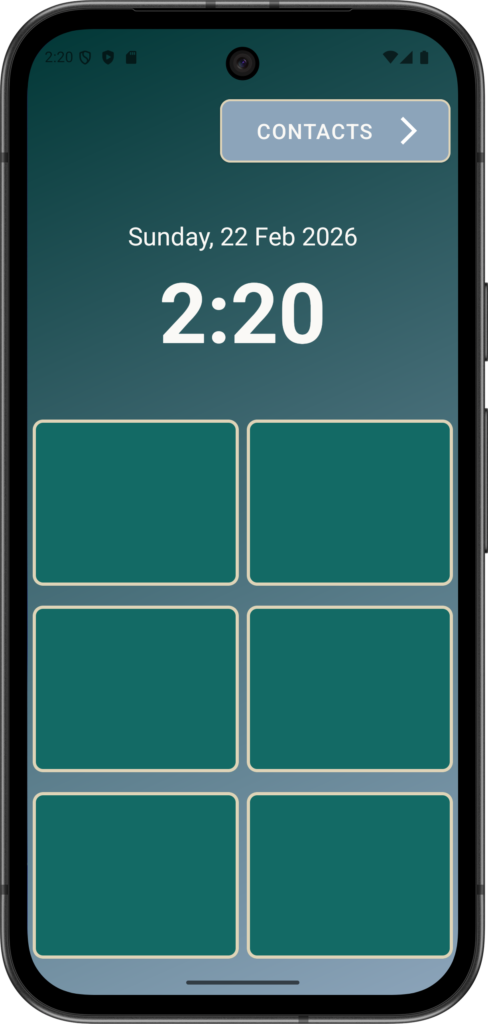
- Speed dials have not been setup yet (just green boxes) – so press the ‘CONTACTS’ button on the top right of the main screen
- Scroll the Contact List and briefly press any of the names in the list
- In the confirmation window that comes up -> Select CALL
- This will ring the phone of the person selected and when they pick up the phone, you can talk to them as long as you like.
- Press END CALL to end the call
Note: Refer to the Advanced section regarding setup of images on the Contact List and Speed Dial buttons
Select CONTACTS
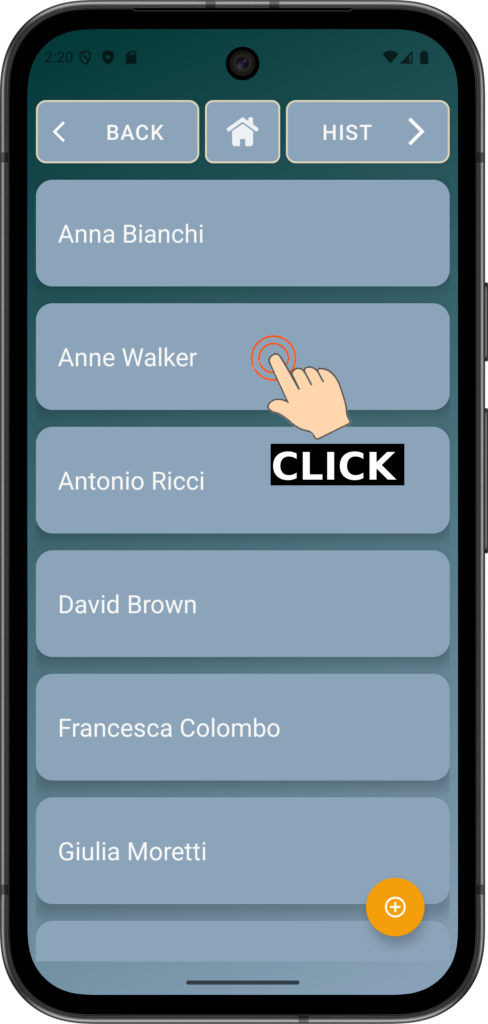
Click on a name from your contacts list
Note: Your Contacts list will be different. If you have NO contacts, then add one using the yellow + button.
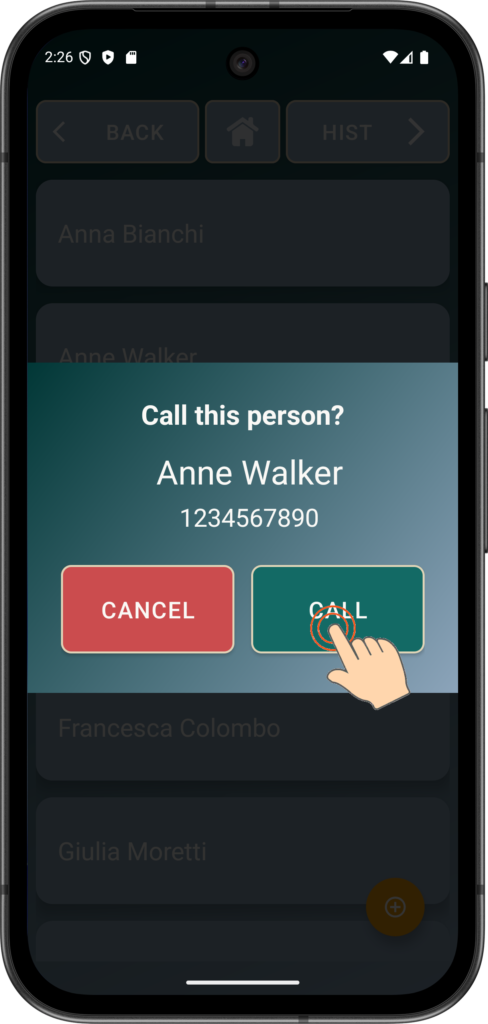
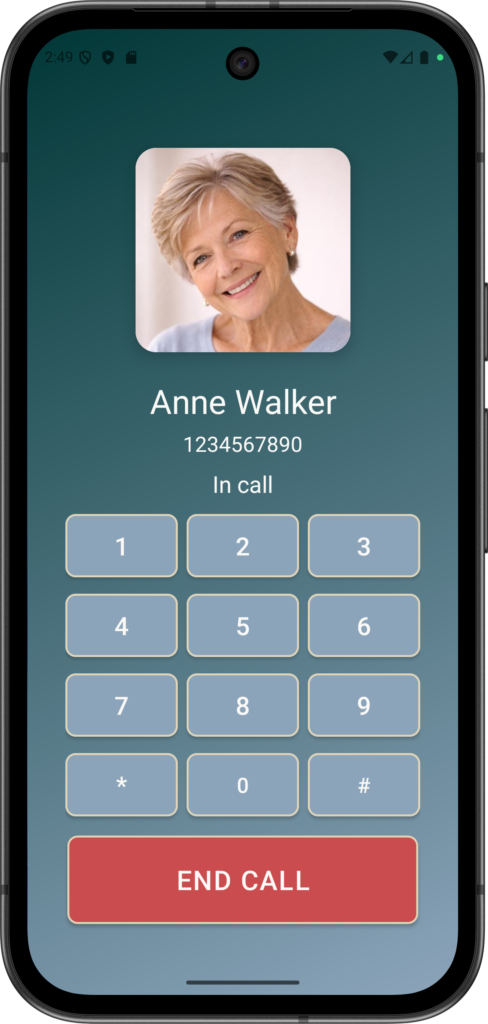
Select ‘CALL’ to call the contact (Anne Walker in this case)
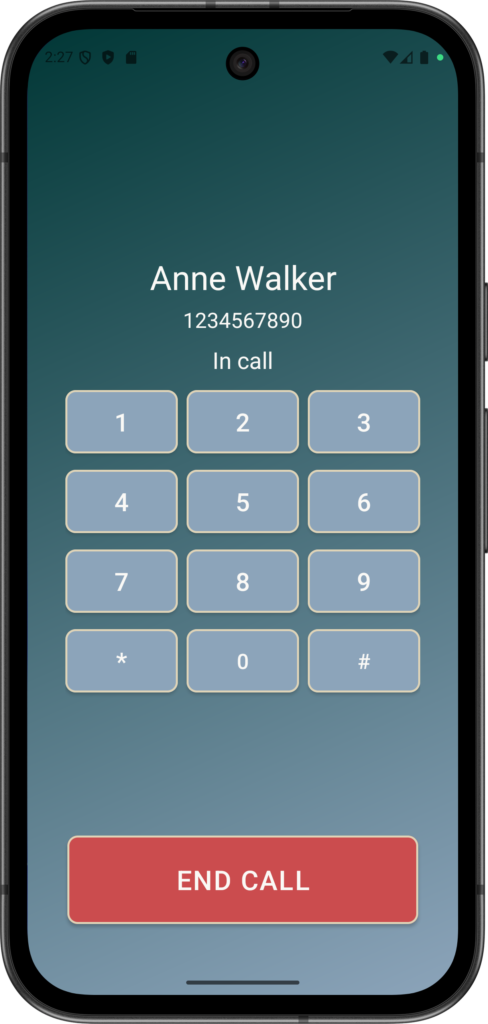
Anne picked up the call, we spoke then you can hang up the phone by clicking END CALL.
Note: Keypad tone (DTMF) buttons are ON by Default but this can be changed in Preferences
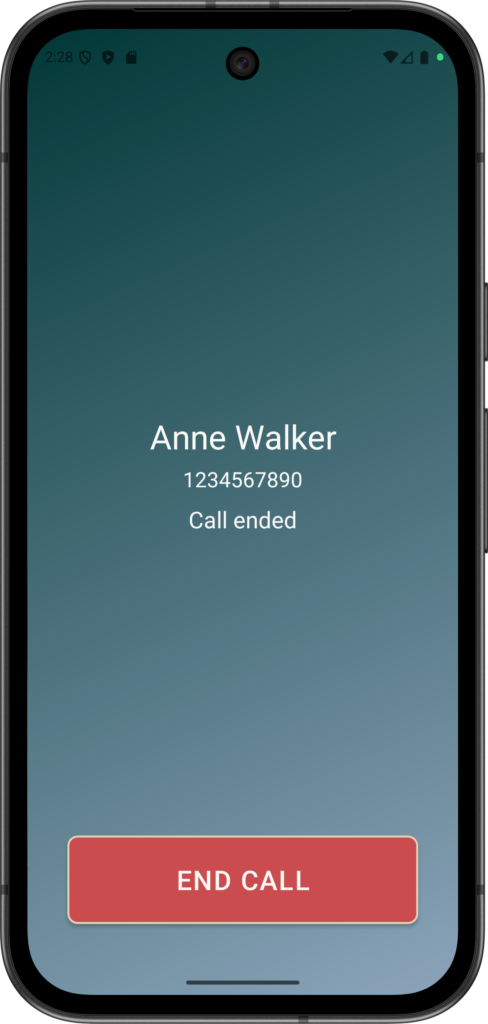
Finished talking to Anne and the phone hangs up.
Your first Speed Dial Button
Speed dial buttons allow users to call important contacts with a single tap, reducing the need to remember numbers or navigate complex menus. This lowers the risk of confusion or accidental calls, especially for users with memory or dexterity challenges. It also provides reassurance by making help or family instantly accessible.
Unlike the Contacts list, the SpeedDial buttons must be configured. As the Home Screen is limited to 6, 8 or 10 buttons, names from the Contacts list must be assigned to SpeedDial buttons. Unlike dialling a contact which involves a short, momentary tap on the contact name, the assignment of a contact to a SpeedDial location must be done with a Press-and-Hold action on the contact name. This is what is termed a ‘Long Press’ action that will bring up the Contact Options menu and enable a SpeedDial button to be assigned to a known Contact:
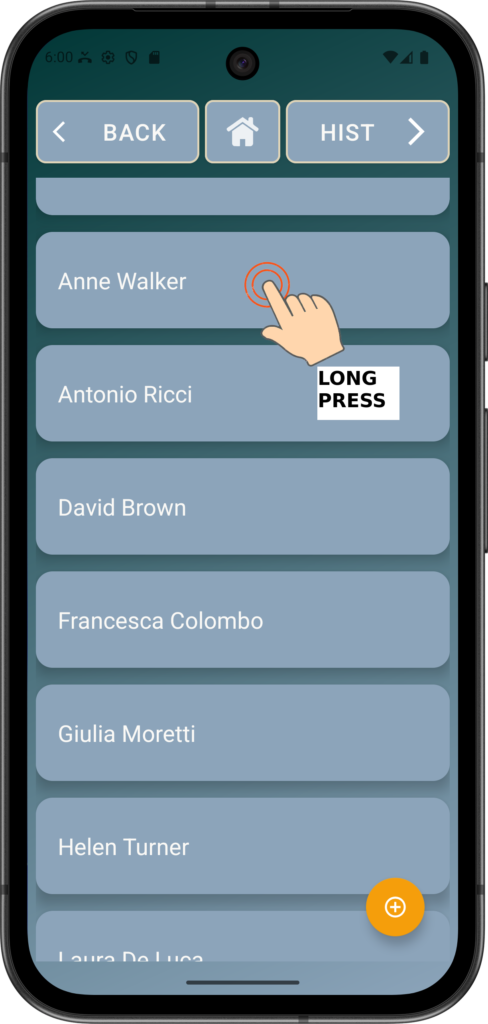
Long Press one of the contact names
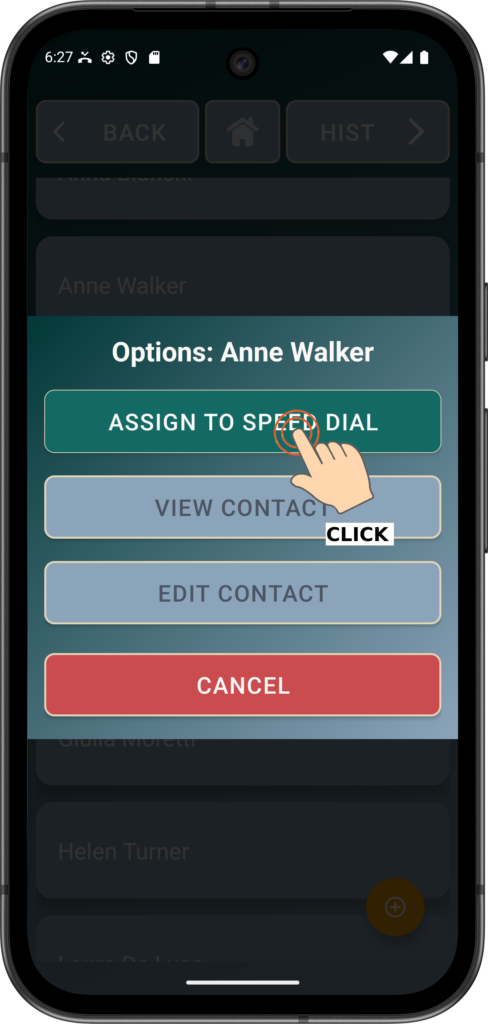
Click “ASSIGN TO SPEED DIAL“
Note: If “REMOVE FROM SPEED DIAL” shown then the contact is already assigned.

Assign to the Slot where you want the Contact to appear.
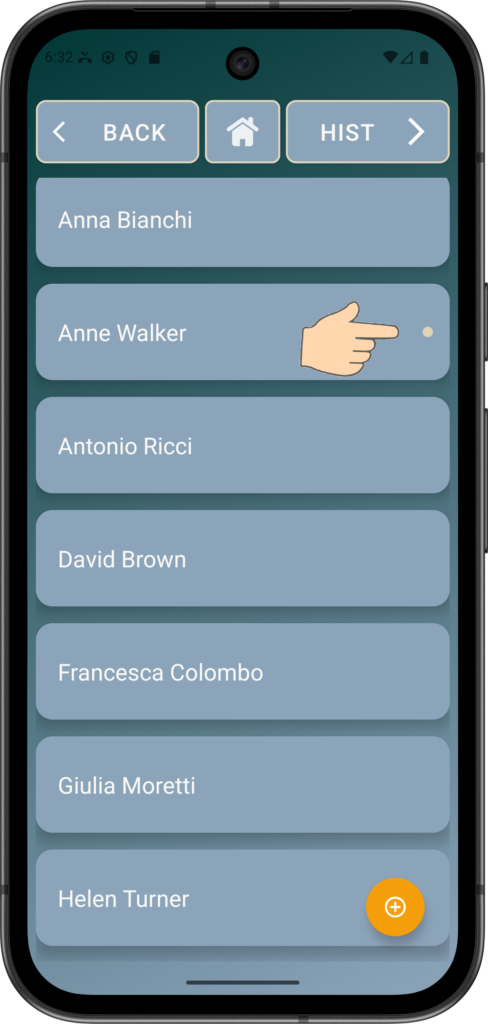
Assigned contacts have a DOT to show that a speed dial has been assigned.
Click BACK to see the Speed Dials.
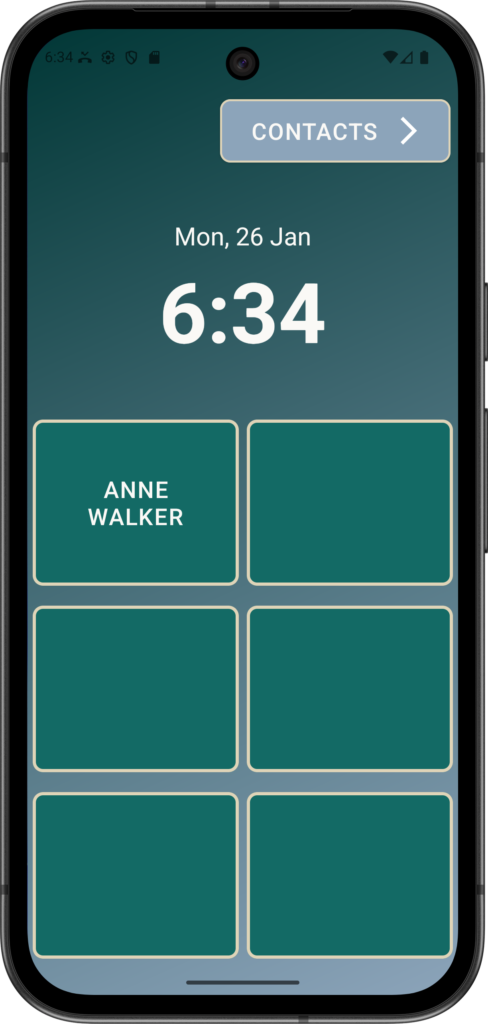
Anne now a Speed Dial Button in Slot 1, just click to dial.
Repeat until you have setup all the SpeedDial buttons you need.
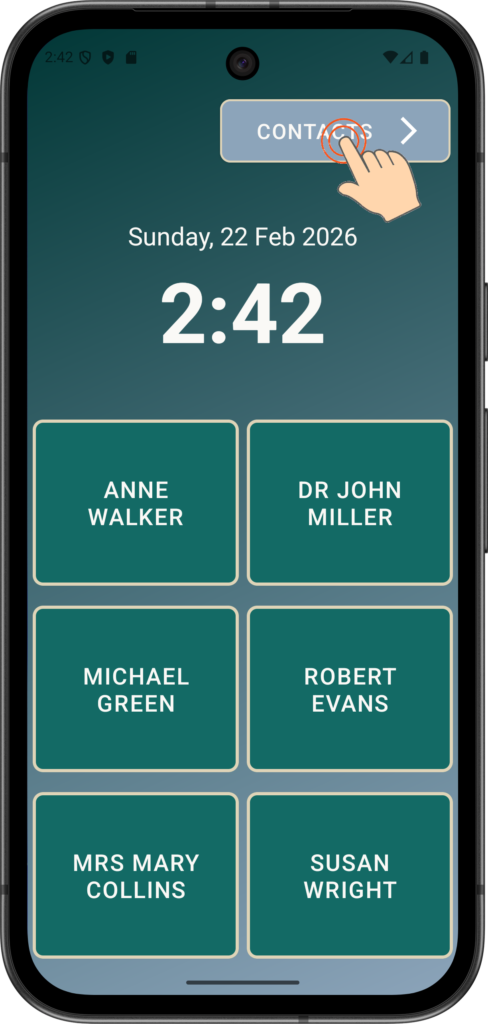
If 6 is not enough, up to 10 can be added – to do this, start by pressing CONTACTS
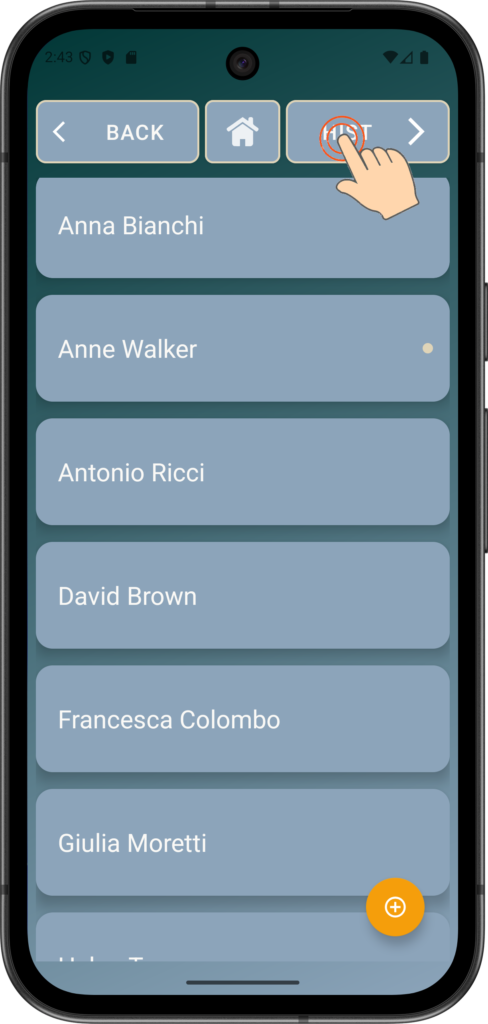
From the Contacts page, click HIST to go to the Call History page
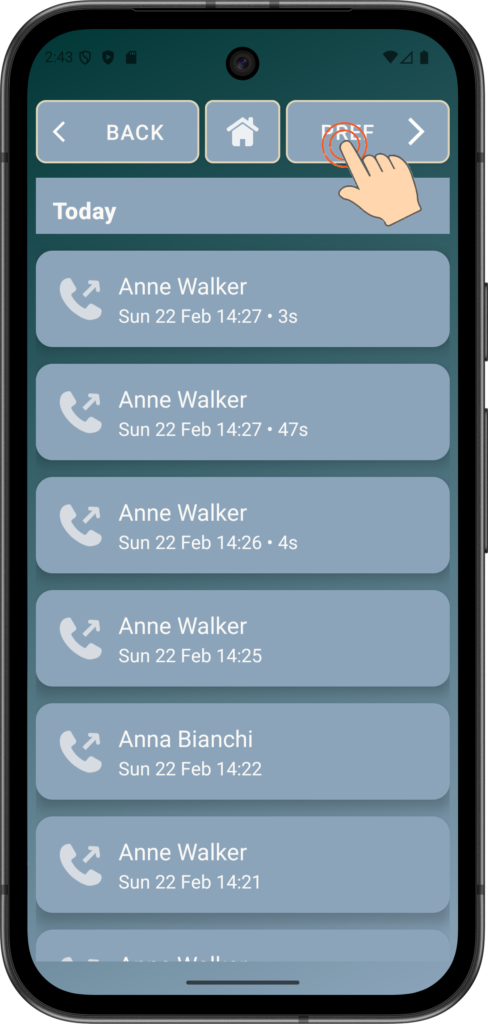
From the Call History page, click PREF to go to the App Preferences page
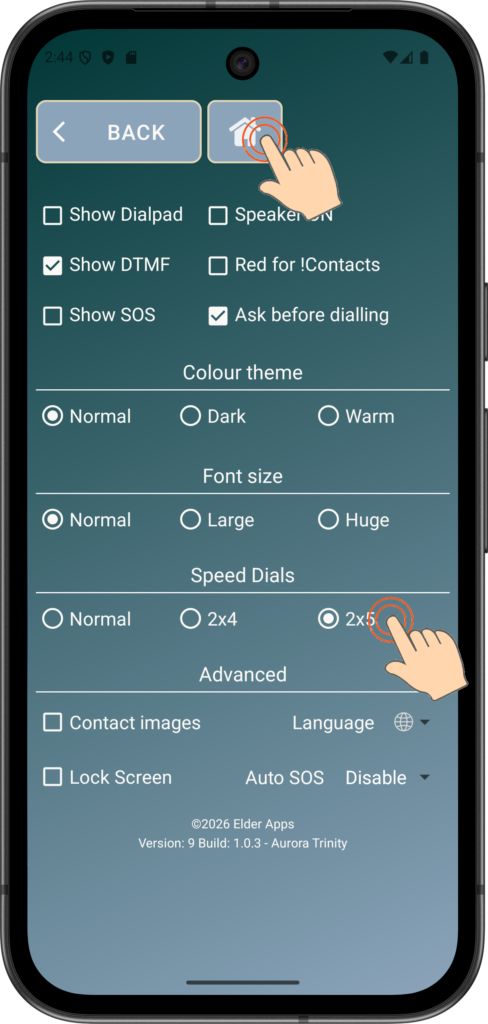
Change SpeedDials to 2×4 for 8 or 2×5 for 10
Click the HOME button to return to the Home Screen when done.
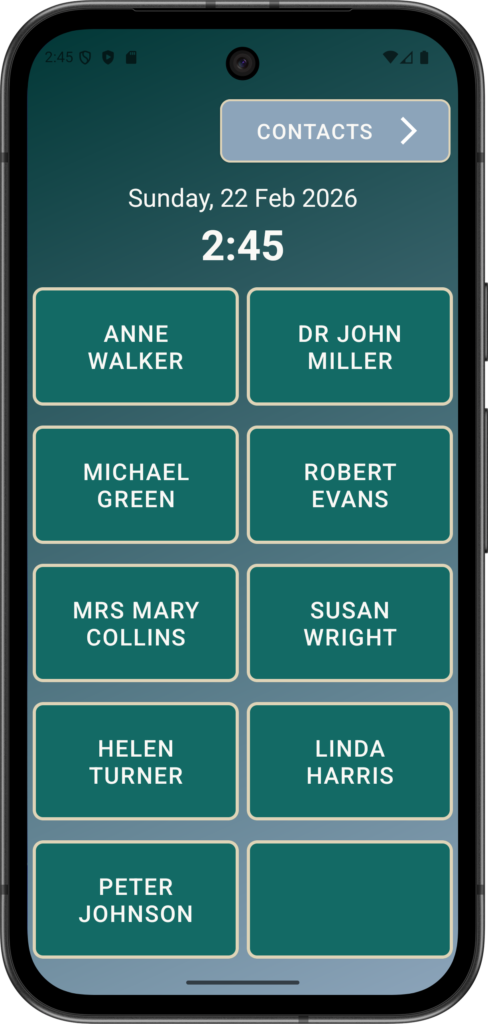
You can now add more SpeedDial contact entries as needed.
The example shows 9 setup of the 10 available using the same process as before.
Viewing Call History
Having a call history helps elderly users easily see who they have spoken to and when, reducing confusion and repeated calls. It allows them or their carers to quickly return missed calls without re-dialling numbers. This improves confidence and provides reassurance that important calls have not been forgotten.
- To view the Call History, click CONTACTS from the Home page
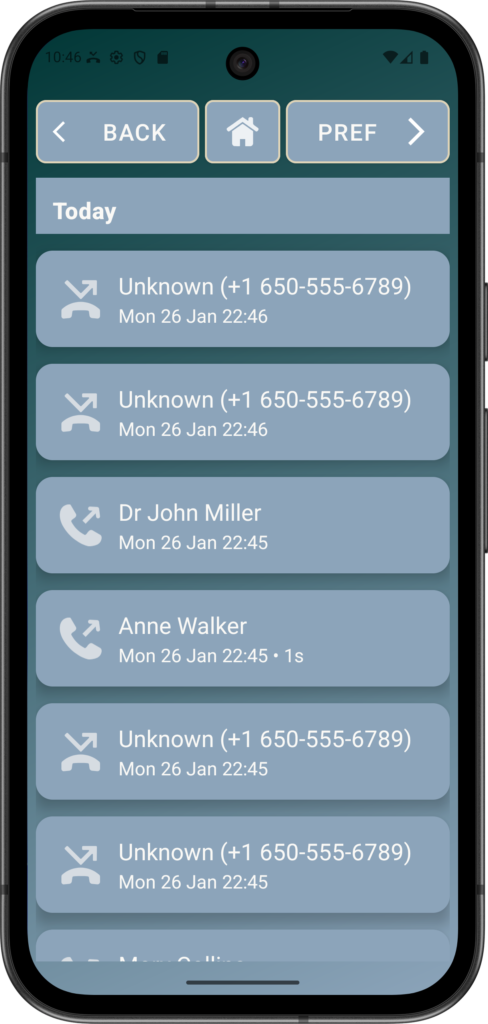
- From the Contacts page, click HIST to view call history
- Symbols show incoming, outgoing, missed and blocked calls
- Short press to call a prior Caller, Long Press to apply Blocking:
Using the Call History list to BLOCK unwanted callers
The ability to block callers protects elderly users from unwanted, nuisance, or scam calls that can cause stress or confusion. It helps prevent repeated interruptions from the same numbers, improving peace of mind and focus.
This feature also adds an extra layer of safety by reducing exposure to potential phone scams, with steps detailed below:
Example of problem Unknown Caller who keeps ringing
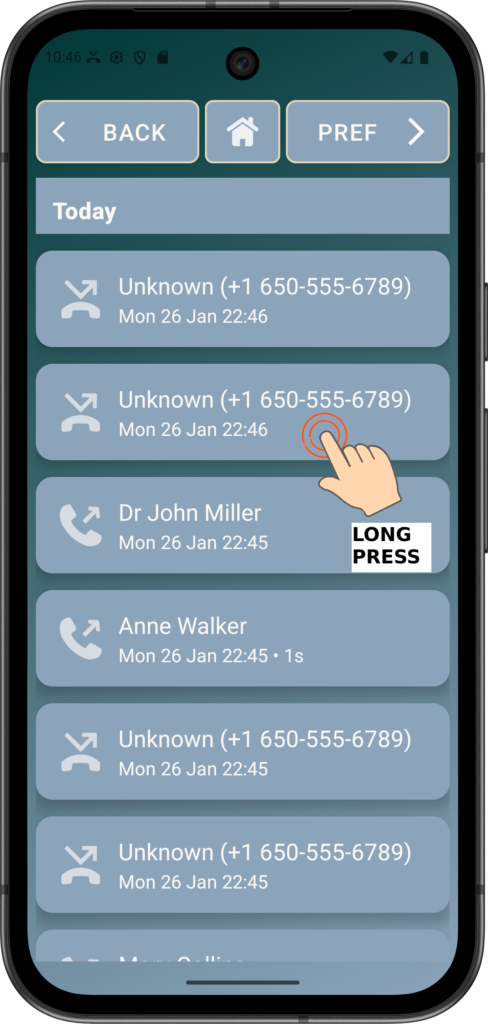
Press-And-Hold (‘Long Press’) on the Calls History entry to activate the Blocking menu
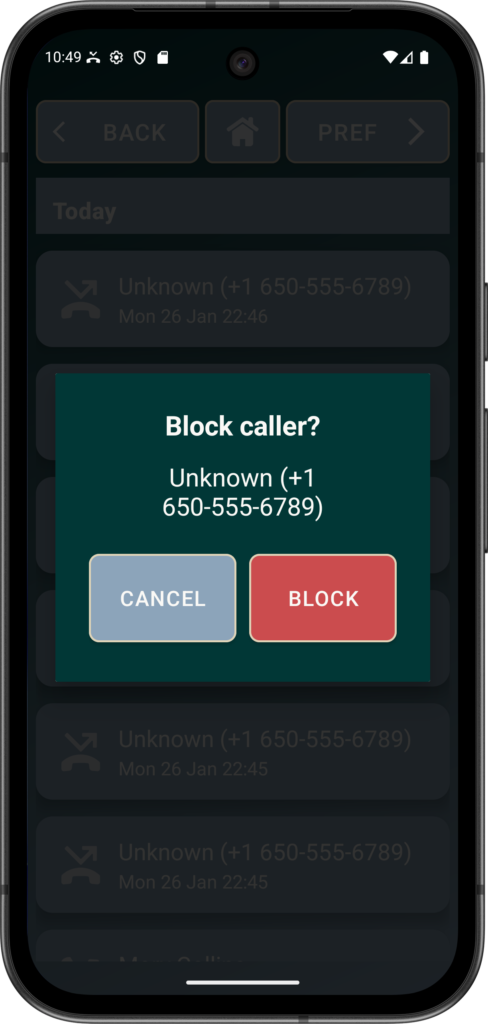
Confirm Blocking ON or Cancel
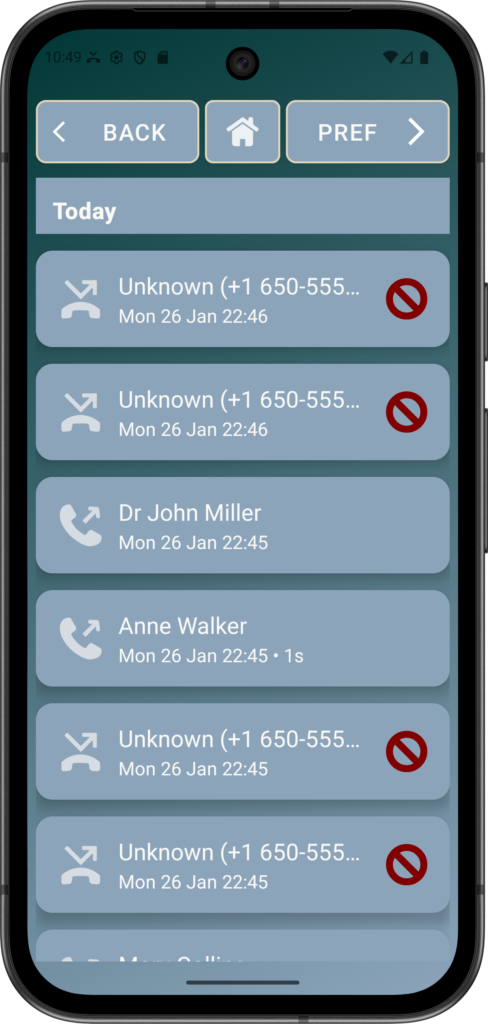
Unknown Caller blocked and no Calls arrive and the phone does not ring.
The phone continues to work the same for everyone else.
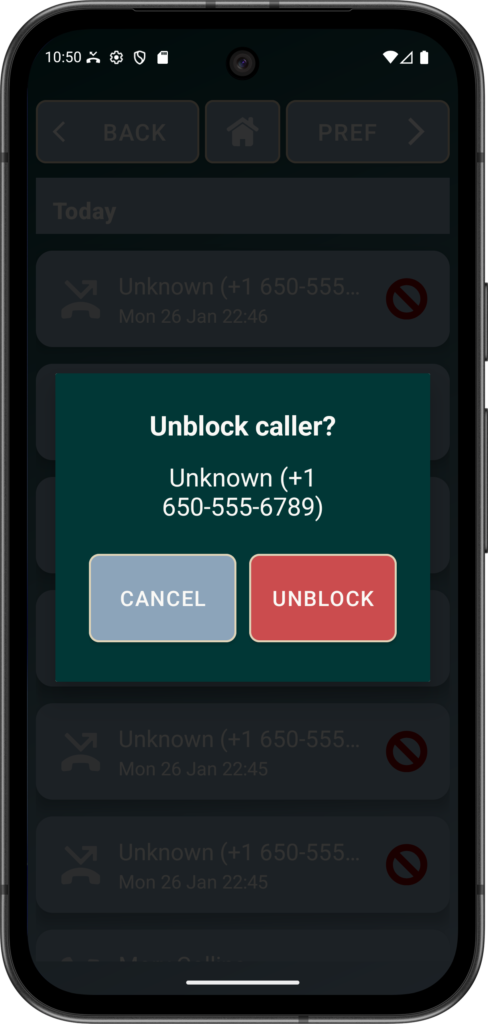
You can Unblock any blocked callers in the same way (i.e. Long Press on the blocked caller in the Call History and then select UNBLOCK)
Calls
When someone calls you, Elder Dialler works just like a normal phone.
- Your phone will ring.
- You will see the caller’s name or number clearly on the screen.
- You can answer the call by tapping the large ANSWER button on the screen.
Elder Dialler does not block calls unless you have turned on the blocking option for a particular contact or Unknown number.
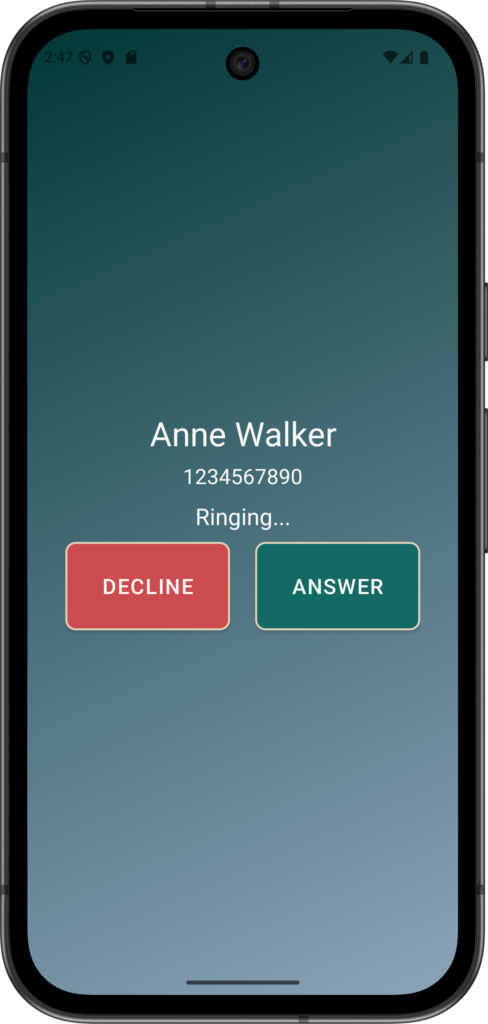
Anne is calling and you can elect to:
DECLINE – the phone is not picked up and Anne’s call is ignored
ANSWER – you can start talking to Anne.
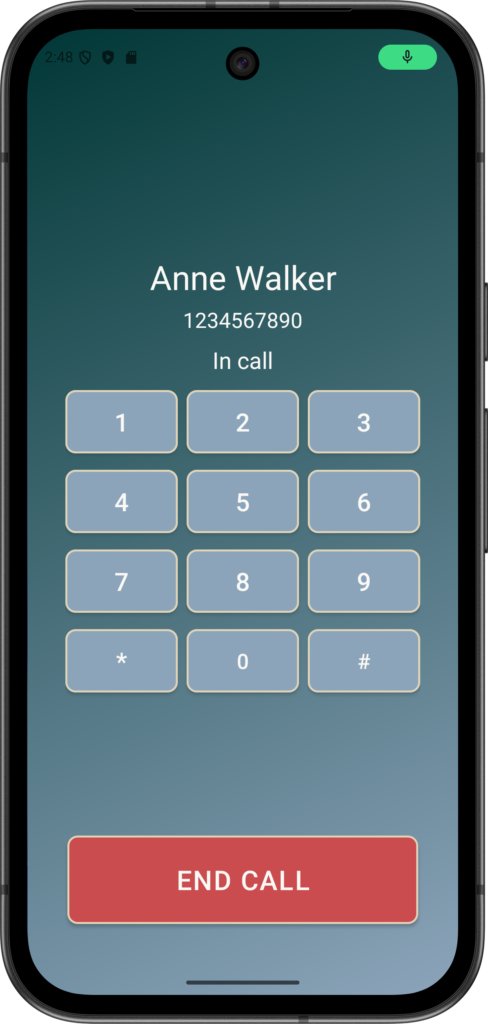
If you clicked ANSWER, then the above will be shown (with tone keypad)
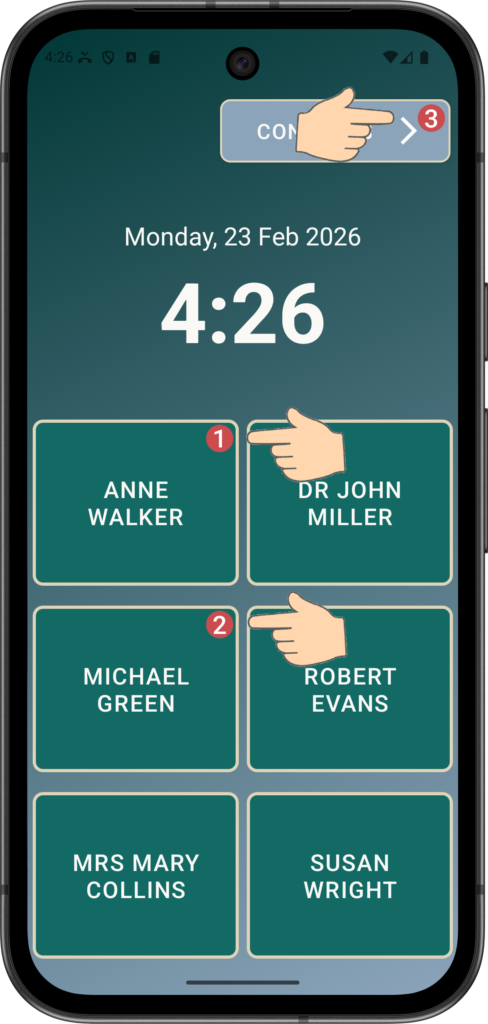
When an incoming call is missed, a number is shown on the speed dial button of the person that called. This can be cleared by calling the person back, or viewing the Call History page to see when the person rang.
In the above example, Michael called twice, Anne called once, and there is a total of 3 missed calls.
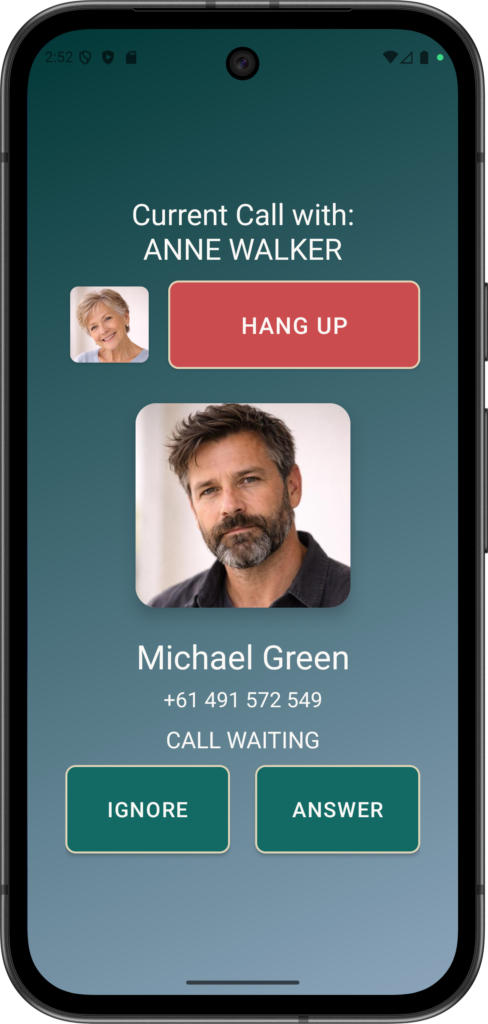
If the tone (DTMF) keypad and/or images are enabled, then the tone keypad is displayed along with the caller photo.
Call Waiting
Call Waiting happens when you are already talking to someone and another person calls you:
You will see a clear message that another call is coming in.
You can choose what to do:
a. Hang Up the current call and talk to the new caller
b. Answer the new call (the first call will be placed on hold), or
c. Ignore the new call and continue your current conversation.
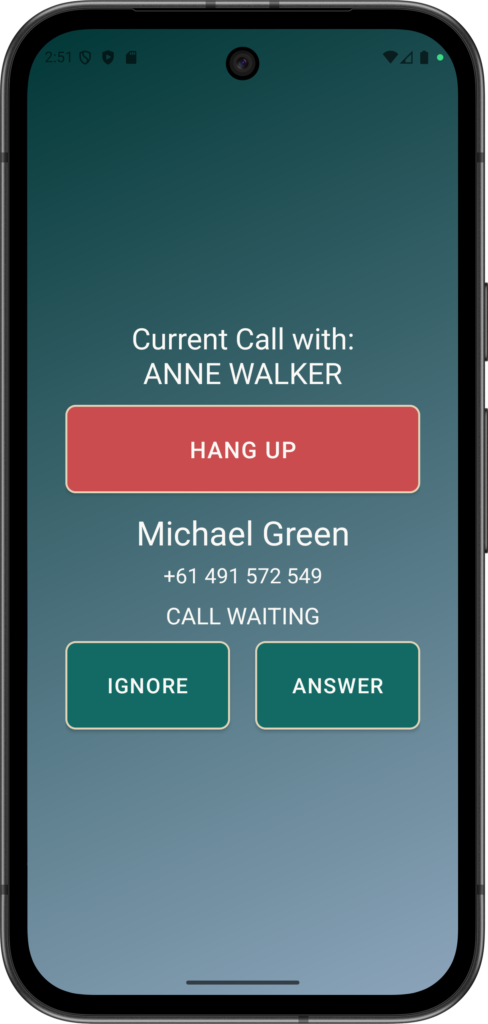
As an example, Michael is trying to call you, but you are already talking on the phone to Anne. You can press:
HANG UP – to hang up the call to Anne and start talk to Michael.
IGNORE – to keep talking to Anne and just ignore the call from Michael.
ANSWER – to start talking to Michael and put Anne on hold. When you hang up after talking to Michael, you will be able to talk to Anne again.